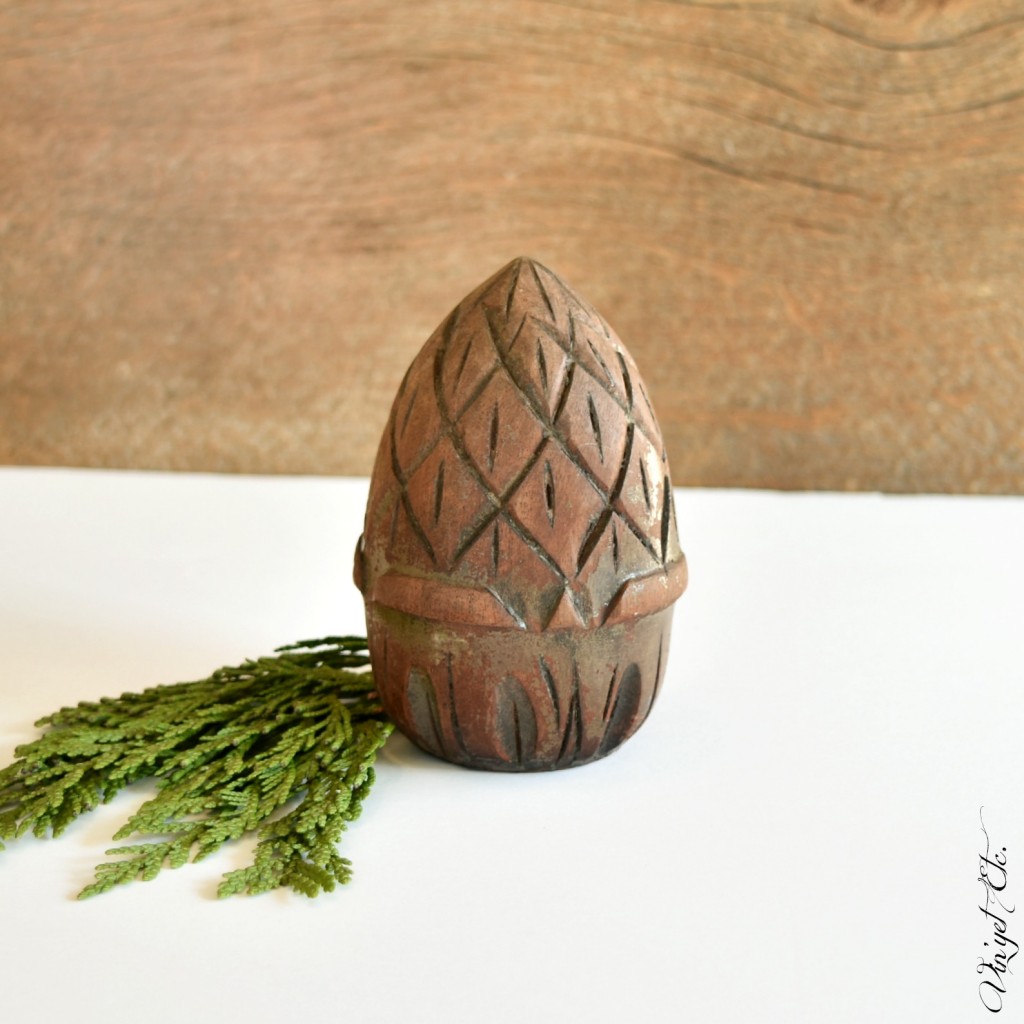
Pinecones and buffalo check have been my inspiration this Christmas season, buffalo check because, buffalo check! And pinecones because they are so darn cute! I think I have every type of pinecone there is in my decor stash… huge sugar pinecones, tiny little baby ones, faux pinecones, mercury glass pinecones and even a set of 4 ornamental pinecones off of an antique bed, and that brings me to my real inspiration… I wanted to use these gorgeous wooden pinecones on my mantel this year…
You’ll have to wait to see the mantel, that’s a post for another day… but in styling the mantel I found I needed a contrasting colour to pop off of the greenery. And that need for contrast has brought me to this DIY tutorial…I must admit that this is one of my favourite little projects to date, I am so happy with how they turned out.
I’m also pretty stoked to be joining in on a huge, Home for Christmas blog hop with some of the most phenominal bloggy friends I know… so much talent and inspiration ALL in one place. A great BIG thank-you to our hosts at, Hometalk.com and CountryLiving.com.
And, Funky Junk Donna, wow! Thanks so much for organizing this! xoxo
I’m so glad you could join us for, Home for Christmas! Please enjoy all of the major inspiration in the links at the end of this tutorial or follow along on Facebook or on Instagram, just click on the hashtag, #HomeForChristmas. We enjoy sharing with you and hope you will find inspiration in what we all love doing. xo
Now on to the tutorial…
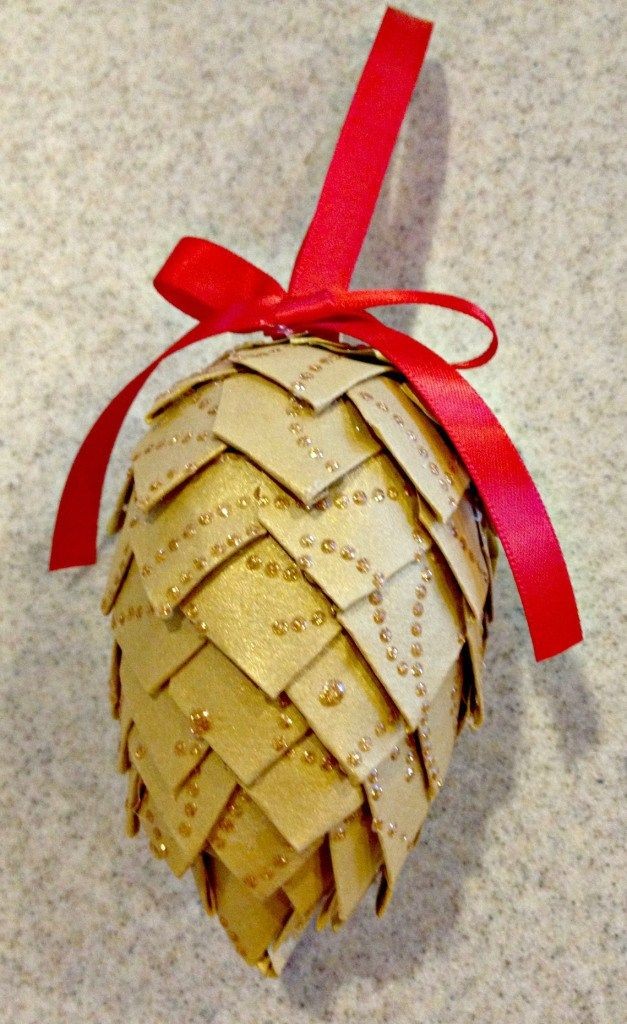
I needed a contrasting pinecone for my mantel… I put that on the back burner one evening and decided to flip around on Pinterest… and eureka! I found the perfect thing. This was the pin that sparked this project. I of course clicked on the link and looked for a how-to… this image only went as far as a round up post on a popular web site, the original content was gone, WHOMP WHOMP!
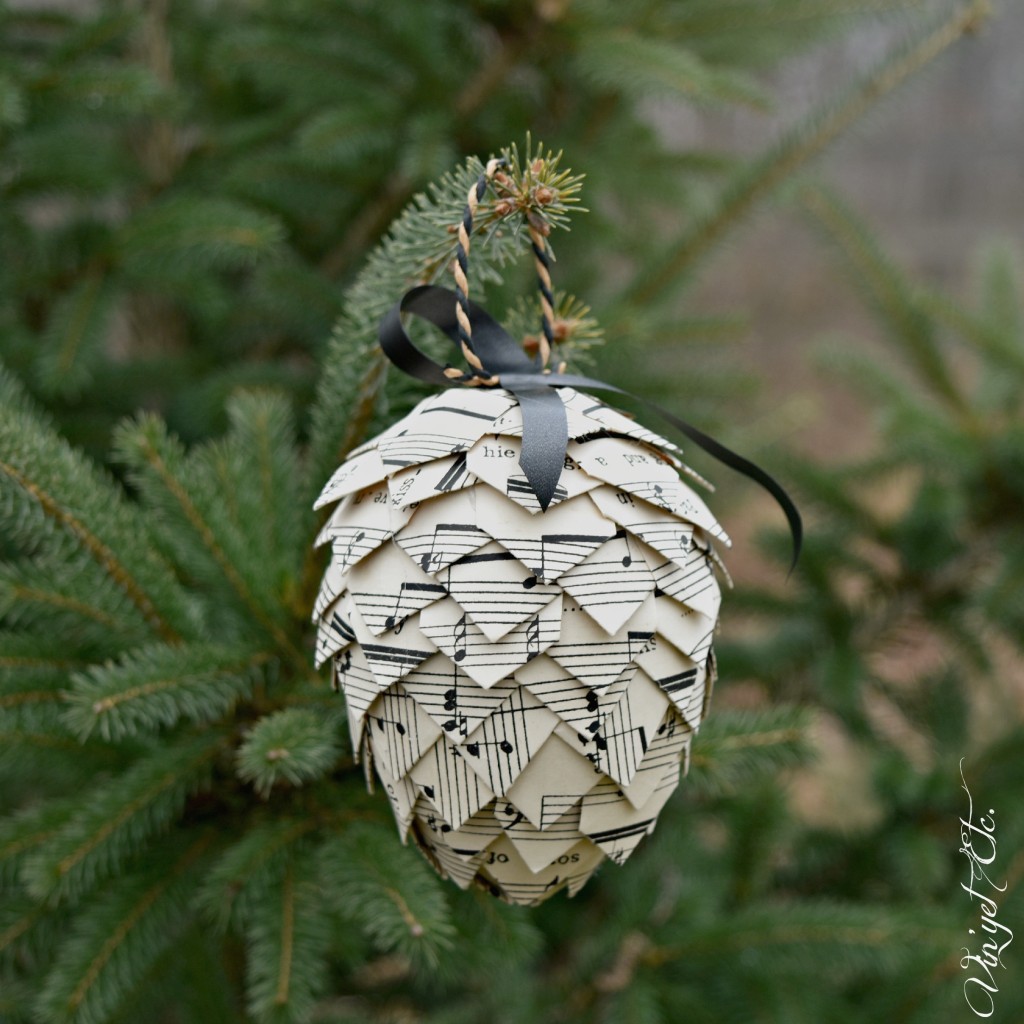
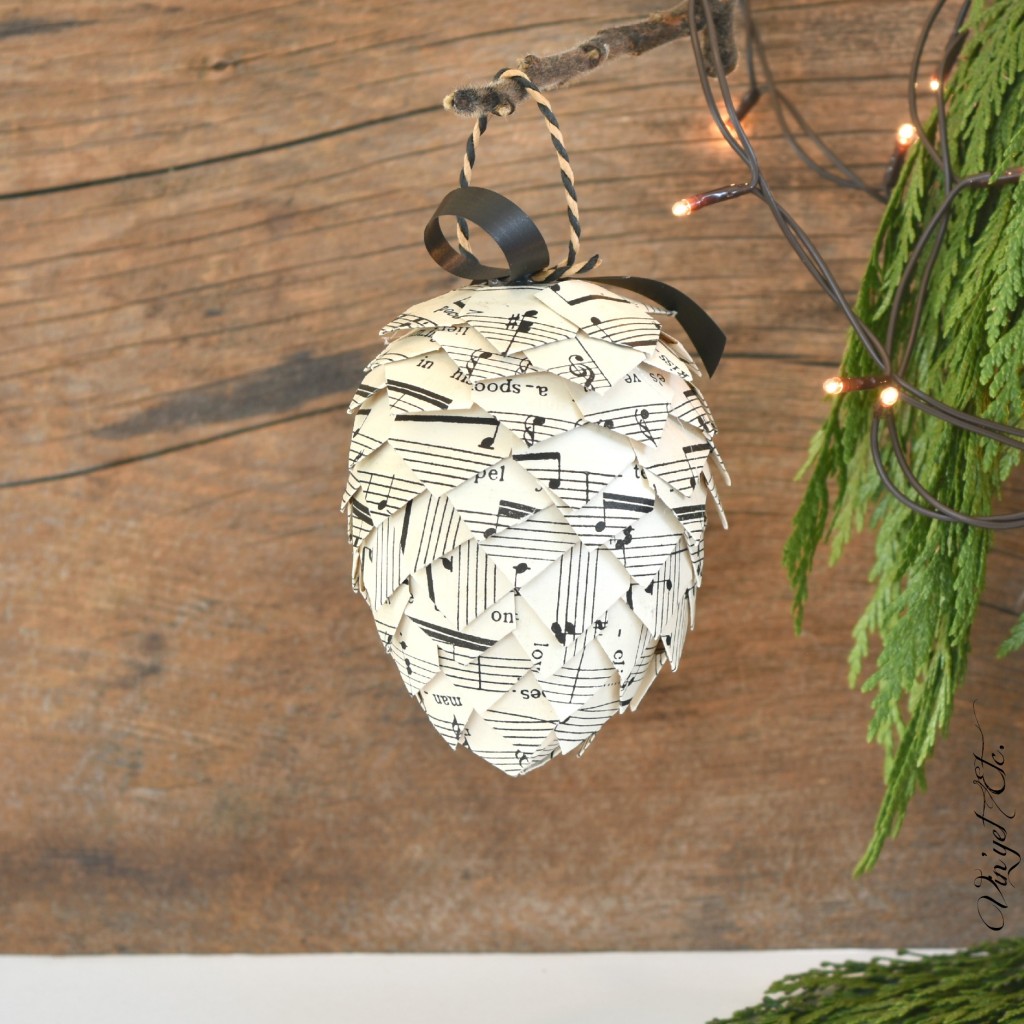
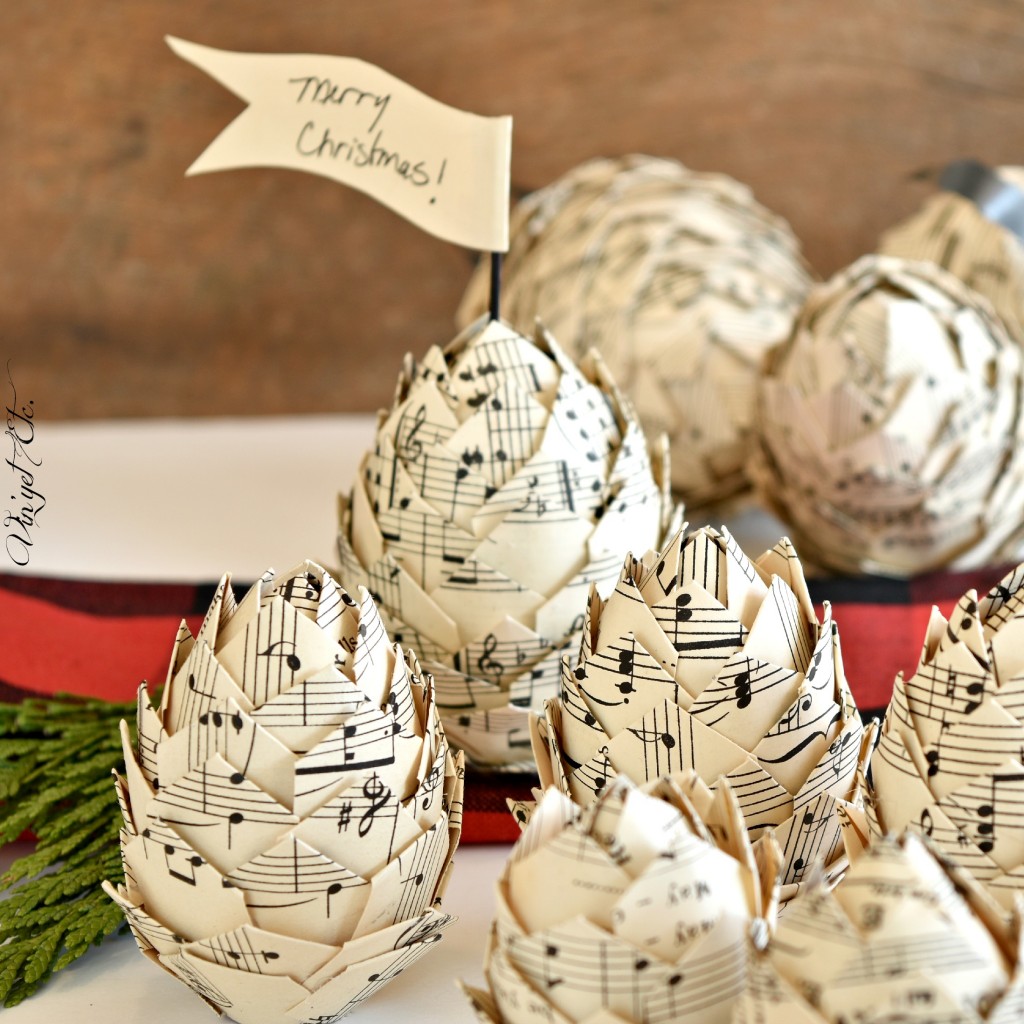
Mad search mode began, how the heck do I make these things? Finally I found lots of inspiration from searching, paper pinecone ornaments… this is the tutorial I ended up following the closest, but of course I modified it to suit my needs. Let me just say that this little project has so many uses, I will be using them on my mantel as stated above… but I see these as hostess gifts, name tag holders on a beautiful table scape, Christmas tree ornaments, make your gifts a little more special with these cuties! Really, I could do a whole post just telling you all of the potential! And, I’ve used vintage music sheets to make mine… you could use your favourite colours, all white, all black, again sky is the limit, seriously… I could do a whole post, so many possibilities!
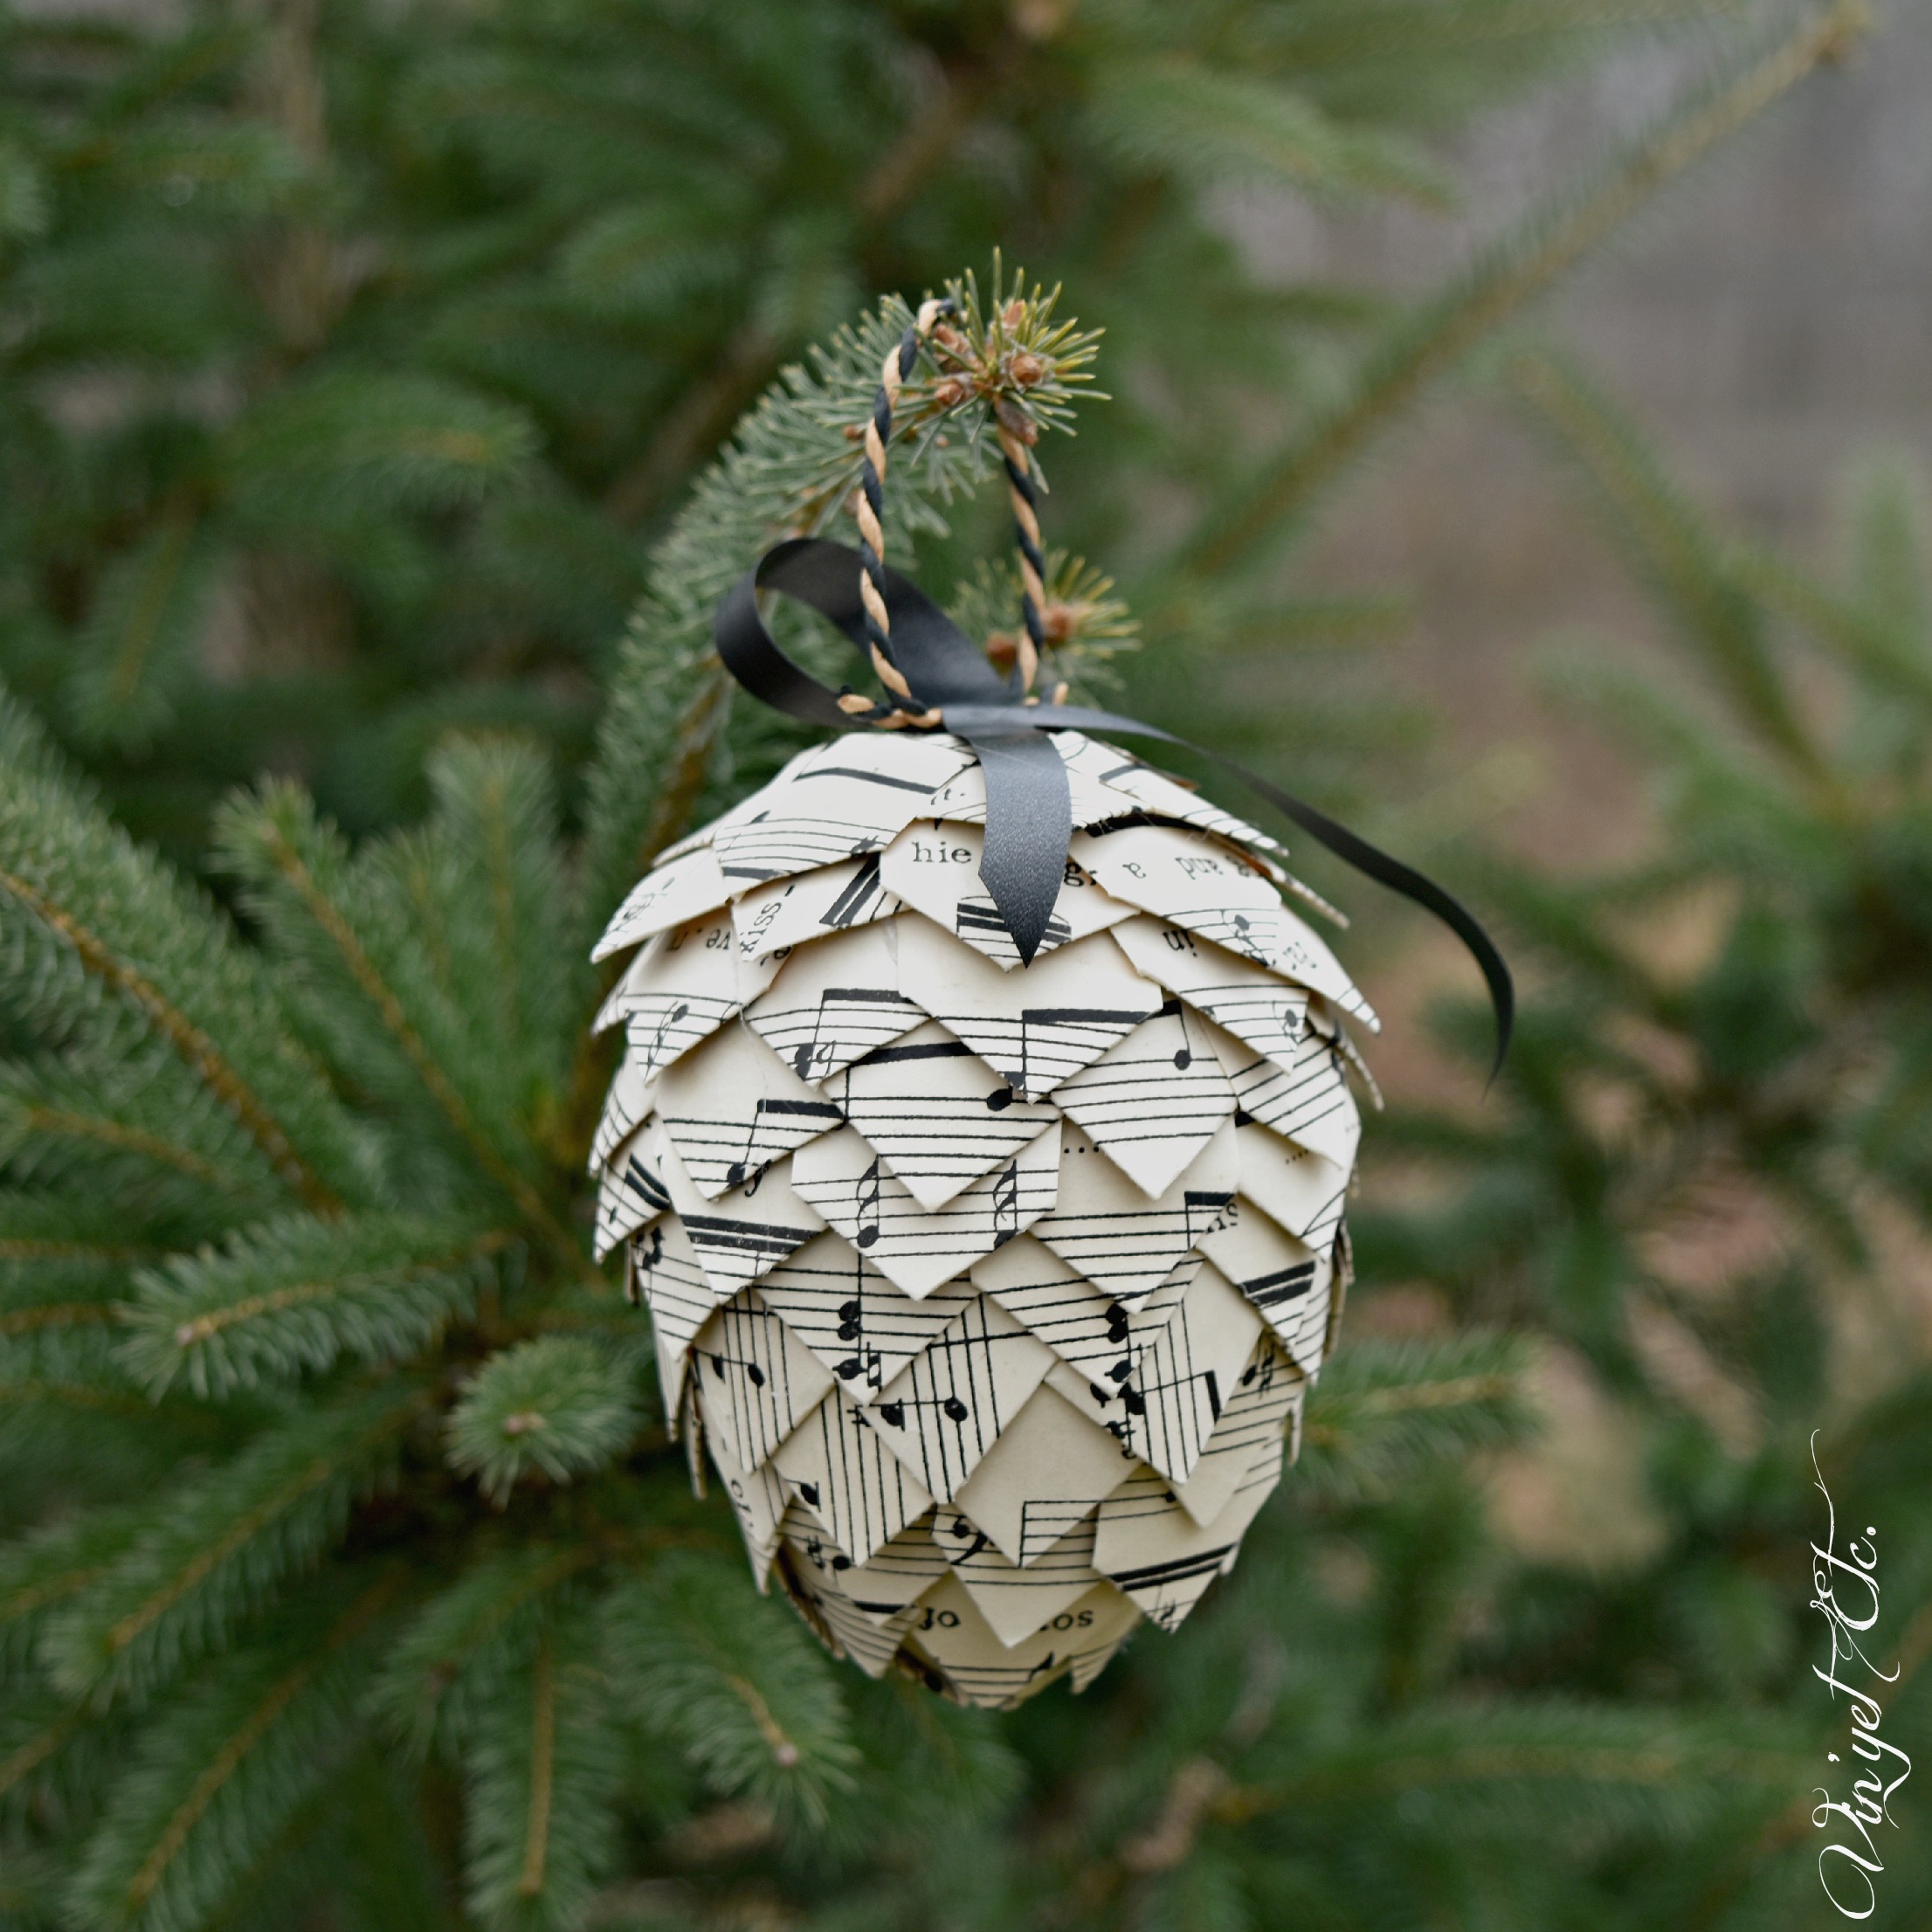
I liked this guy so much I carried him all over to take pictures… haha, I’m a bit looney!
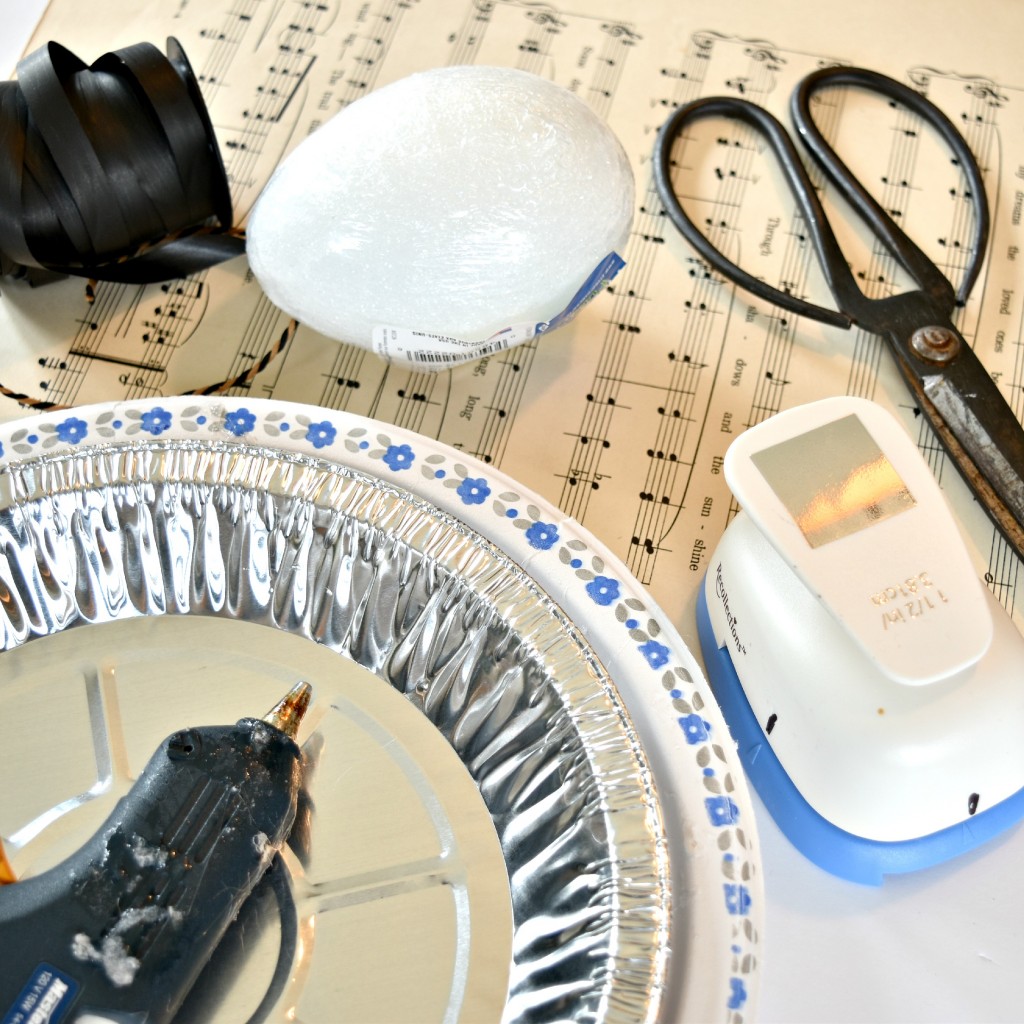
Materials:
Styrofoam eggs multi-pack (Michael’s) I used varying sizes and made 10 in all.
1 1/2″ square punch (Michael’s) – I used this size for each pinecone and loved the way each one turned out.
Any paper that you love, I used vintage music sheets. (obsessed much)
Glue gun and glue sticks.
Scissors.
Any decorative ribbon (optional).
How I made these pinecones:
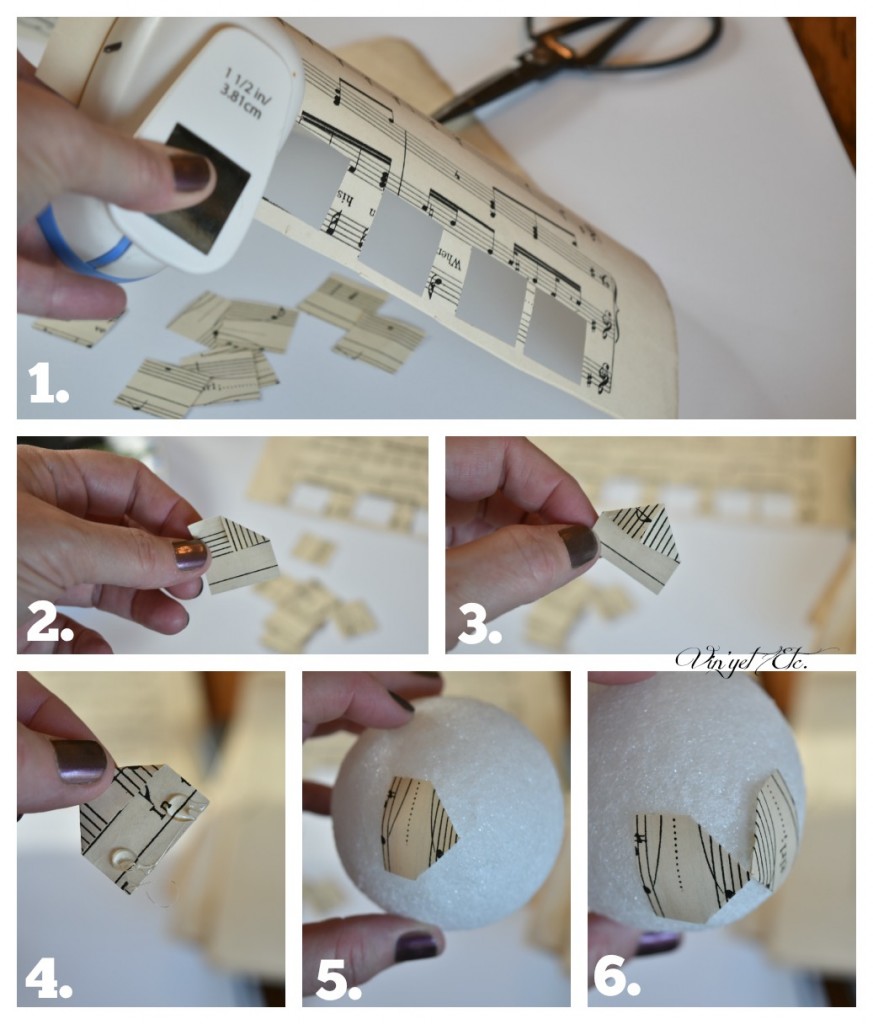 1. Cut out a lot of squares with your square punch.
2. Dog ear or fold down one corner of your square.
3. Fold down second corner to make a point.
4. Dot some glue on your folded paper.
5. At the top of the egg (the skinny top) glue your pointed paper down, make sure your pointed tip will meet the other pointed tip on the second piece you glue down.
6. Glue your second piece down, make sure tips are touching and are at the very top of the skinny part of the egg, don’t worry if you goof up, just gently peel them off and start over, this project is very forgiving.
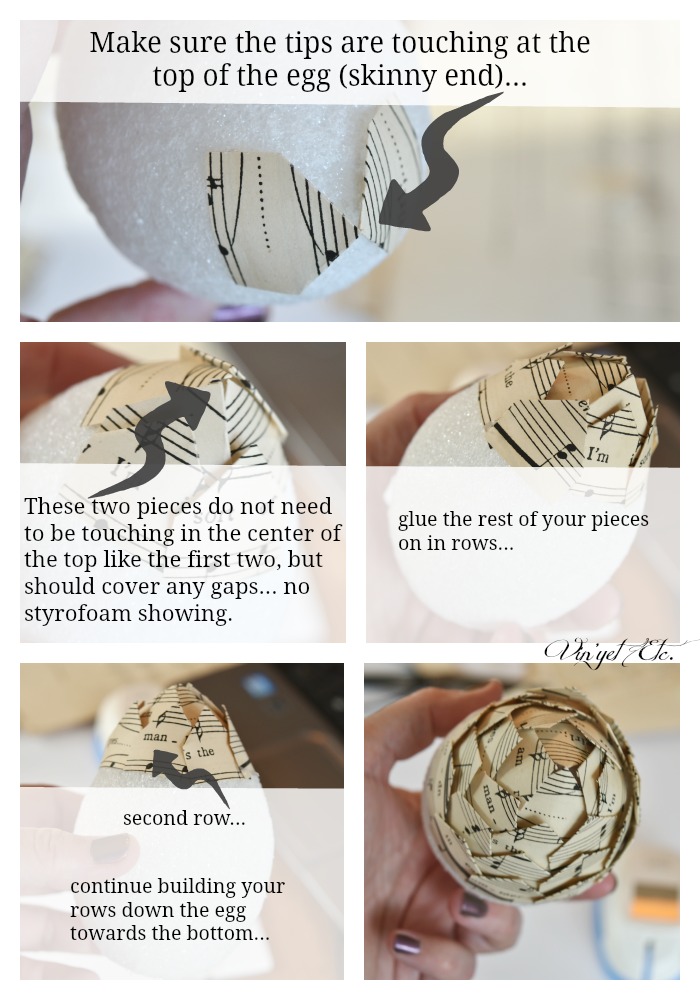 You can finish off the bottom however you’d like, I chose to add some ribbon, an option for you to hang it from the Christmas tree if you want. I also did not fuss and try to make these pinecones perfect, it really adds to the character if they aren’t perfect… just like everything else in life! 🙂
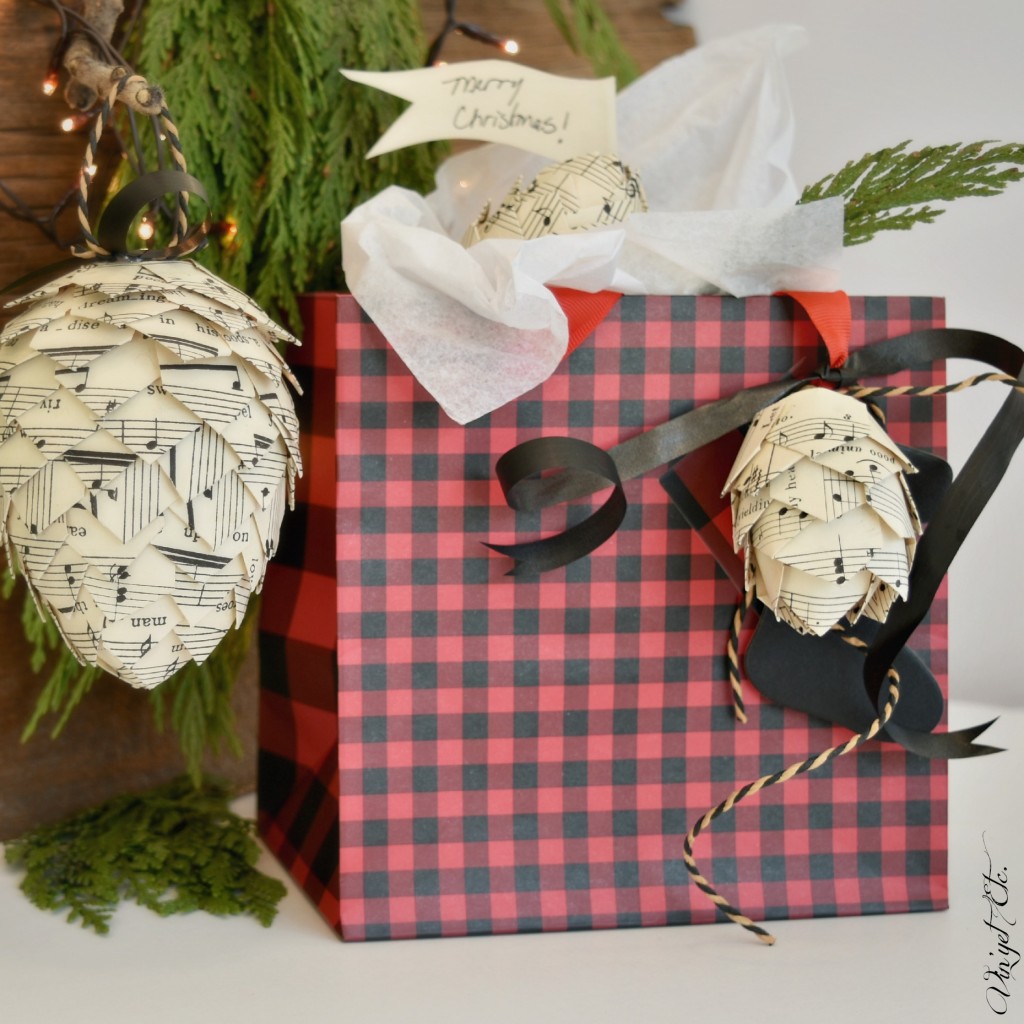
As Christmas ornaments…
Adorn a gift with a handmade pinecone!
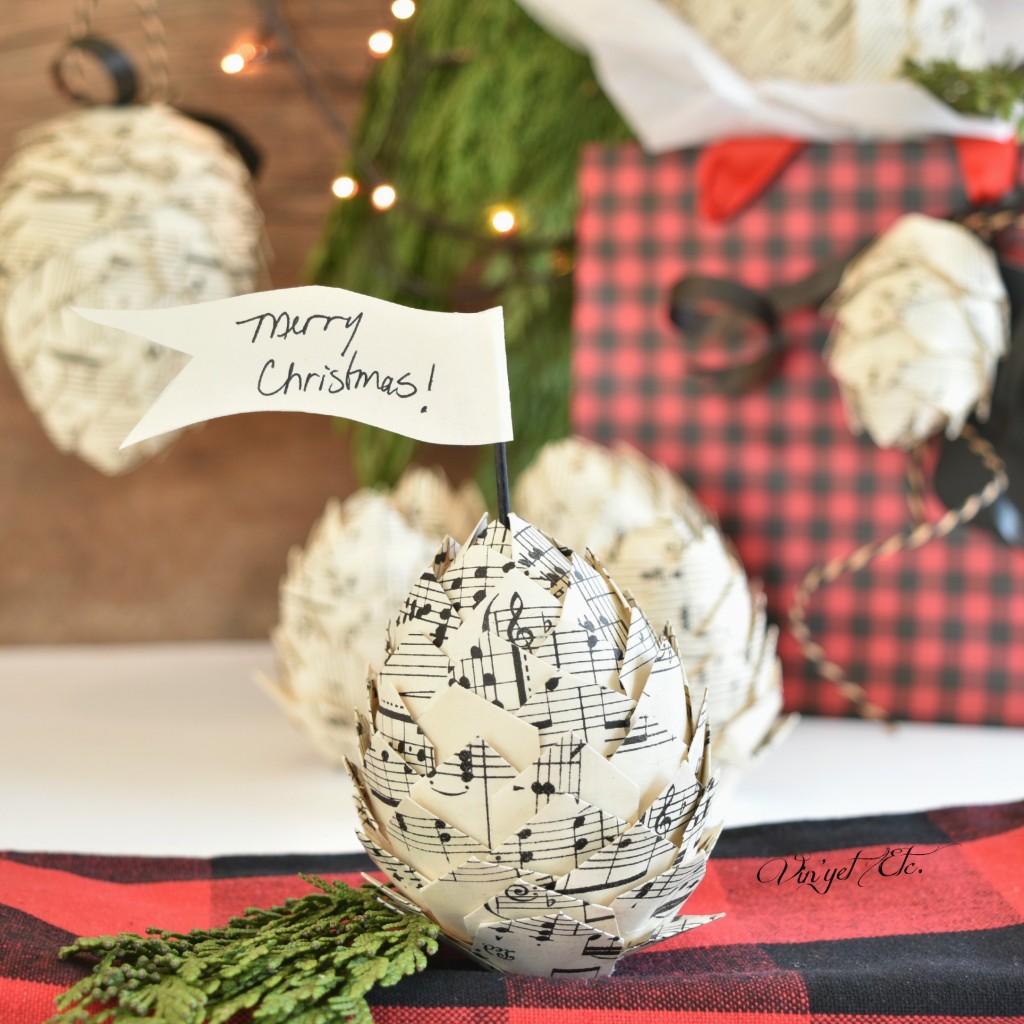
A DIY pinecone on a table-scape… write everyone’s names for each setting, add that personal touch… a great little keepsake for your holiday guests.
Eeeek, so darn cute! I can’t wait to show you how these little guys look on our Christmas mantel, stop in again later this week I’ll be sharing some of our rustic farmhouse Christmas.
Thank-you so much for stopping in and Merry Christmas everyone!
![]() PS. Did anybody count how many times I said pinecone? HA!
PS. Did anybody count how many times I said pinecone? HA!
Again, I would really like to say a HUGE thank-you to our hosts for this opportunity to link up and let this little, Christmas pinecone ornament shine. Now please check out all of the über talented bloggers in the links below… so.much.inspiration!!!!



40 Comments
This is so pretty Laurie! I love the music sheets you used…and I can just imagine you carrying this around to take pictures…I *may* do this type of thing as well. 😉
LOL, glad to hear I’m not the only one that does this type of thing, some days I feel very, “out there”. 🙂 I’m glad you like the music sheet pinecone, I’m a bit obsessed with them.
This is GORGEOUS! I love sheet music crafts, and this one is just so beautiful and unique. Your photos are perfection too! <3
Thank-you so much Christina! 😀 And thanks so much for noticing my photos… I’m working hard on getting better! xoxo
This ornament is just stunning! I love it so much!
Thank-you Lindsay! I love them too!
I really like them and can thing of quite a few ways to use them. Beautiful.
Thank-you Karen! 😀
BRILLIANT! I HAVE to make these now. My MIL loves pinecones!
Thanks Deborah, they are so easy I dare you not to fall for them too! I am sure your MIL will love such a thoughtful gift! xo
Absolutely WONDERFUL!! Thanks for the tutorial…. I’m going to attempt to make some for my Christmas tree!!! Pinned!!! 🙂
Thanks Christine! These are so easy, I am sure you will have no troubles! Thanks so much for sharing! xo
These are super pretty and you’ve made what looks difficult- easy with your tutorial. Very clever!
Thank-you Patti! 😀
Oh my gosh, Laurie! These pine cone ornaments are gorgeous! I love how you used sheet music to make them. I just showed them to Leo and told him this would make a great gift for his choir director at church! I can’t wait to see them on your mantel along with that wonderful wooden pine cone! Pinning and sharing!
Hi Jane!!! Thanks so much and what a great idea, I’m sure Leo’s choir director will love such a thoughtful gift! working on the mantel post NOW… yikes. lol Thanks so much for sharing! xoxoxoxoxox
Love the pinecones and thanks for the tutorial. I’m going to give this one a go. Thanks so much for sharing this great idea!
Oh my goodness, these are absolutely gorgeous!! And I love that there are so many ways you can use them in your decorations, gift-giving, etc! Already pinned 🙂
This is fabulous! The vintage music paper adds so much character and charm! Your pics/tutorial are great, too! I also love pinecones:) xoKathleen Charm Bracelet Diva {At Home}
Lovely! Glad you had a punch to get all those squares!!
I love vintage sheet music and pine cones…. great idea combining both!! Great tutorial that turned out so pretty!!
You combined two of my favorite things! Pinecones and sheet music, so lovely!
Laurie, you had me smiling, you’re not looney, they look good on everything, no wonder you took them everywhere to photograph.;o) I’m loving black and white for Christmas and these would be a great addition to any style of decor!
I really like your pinecone version – the music paper takes yours to the top! So festive and cute! Pinning to share 🙂
Love, love, love these Laurie, so cute! I will definitely be trying this! Can’t to see how you used them on your mantel. Pinned.
Wow! So amazingly adorable! I love this, and like you said, it could serve as gifts, place settings, etc.! I might have to give these a go this season! I love that you used vintage music paper! Pinning to remind me to try!
Laurie!!! I love these so much, and just like you, I would use them everywhere. What precious gifts. Merry Christmas to you!
Thanks so much Angie! I’m kind of thankful I don’t have time to make any more…. I’d still be making them, I love them so much!
Hi Laurie! These are incredibly well done – I really appreciate quality work and these are top knotch!… I think I’m going to have to try my hand at these! 🙂 Beautiful work!
so pretty! I love the added detail the sheet music adds.
I love this project. It would be great to use as name place settings too. I am going to make this for sure. Lovely!
I’m so glad you like it Vanessa! 🙂 When I was making them it dawned on me, this little guy would look so cute in so many places.
Ohhh my goodness… these are amazing Laurie! They are so perfect, they look machine made! The music sheets are charming!
HaHa, Donna that could not be farther from the truth… I’m so glad they look perfect, I was worried that they weren’t perfectly lined up like the example I have in the post, thank-you for saying that. I find them incredibly charming, I’m a bit obsessed. 😉 xo
Oooh so pretty. The music sheets make it so lovely and special.
Thank-you so much Alicia!
I adore them!!!!! I had to hold back from pressing the pin button so I could finish the post! Off to pin now.
I don’t know if I would have the patience for this project but I will give it a try!
Wishing you and your lovely family a happy, healthy and festive Christmas season!!
xoxo
C
Pinned. Darling. How I want to make them now!! Hope your Christmas is wonderful. Linda @Crafts a la mode Come join this to my party What to do Weekends…
http://www.craftsalamode.com/2015/12/what-to-do-weekends-153.html
Adorable with the sheet music! I made these many years ago using plaid Christmas ribbon cut into squares as above. They turned out super cut too, and they are still put on my tree every year.
These are so awesome, Laurie! Totally making some; I’ve even got a couple egg styros laying around here. What a fun opportunity to be a part of!