And just like that September is upon us! That speeding train that just went by, ya that was the whole summer! What the heck??? I am never prepared for how quickly the months seem to fly on by! However, Fall is my very favourite so I’m not too mad about it being September already. 😉 Time for cozy layers and changing leaves! Yipee! Last month I shared our summer cabinet with you… and this month I am sharing one simple way I am getting it ready for fall by adding some DIY vintage thistle botanical art to our space. I feel like it’s adding the perfect amount of texture with a side of cozy fall vibes.
Speaking of cozy fall vibes, I have been busy adding simple touches of Fall to our front porch too, if you’d like to see more of what we’re up to on the porch this year you can have a peek here —> Simple Fall Porch – Fall Ideas
Cozy Living
Thank you Jennifer, as always you are such a gracious hostess, the brains behind this whole series. We are the #cozylivningteam, welcome to our cozy living ways. You can see more from Jennifer and her creativity over at Town & Country Living. We are a group of cozy loving friends that simply love to share how we live a hygge life. There are so many inspiring and creative ways to live a cozy lifestyle and this team has all of the ideas! Stick around, at the end of this post the team is sharing more cozy ways and I know they will be inspiring!
If you’d like to see more of what we do you can also follow our, Cozy Living pin board here –> Cozy Living – Hygge
DIY Vintage Thistle Botanical Art
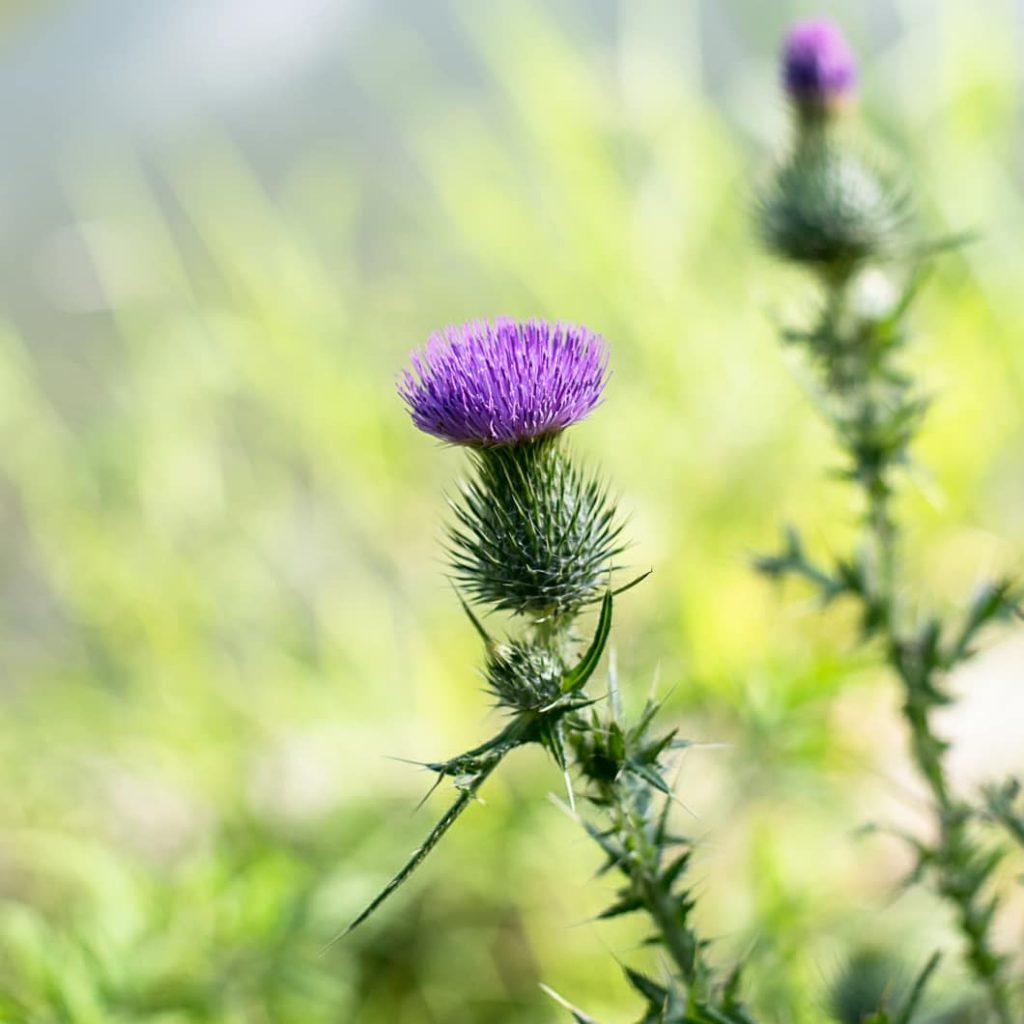
There is just something so beautiful about a thistle that is in bloom, don’t you think? I mean they are super prickly and hurt like a bugger if you happen to poke yourself on one of those thorns, they sure are pretty though. I have a hard time finding them growing wild on our property, Bud HATES them! Hahaha, probably with good reason, he told me that as a kid he used to step on them all of the time and I can only imagine how much that hurts! So, if he sees a thistle he pulls it, right away – like he’s on a mission! 😉 Finding this one (above) growing in the wild on our property was an exciting day! haha I really have to get out more. 😉 Anyways, this one was growing by the pond and I wanted at the very least to take a photo or two of this beauty. I first posted this image on my personal Instagram… This image got me to thinking about how much I adore botanical prints. So one evening I dawned my leather gloves (HELLO THORNS) and snipped this thistle for drying, this is how I did it…
How To
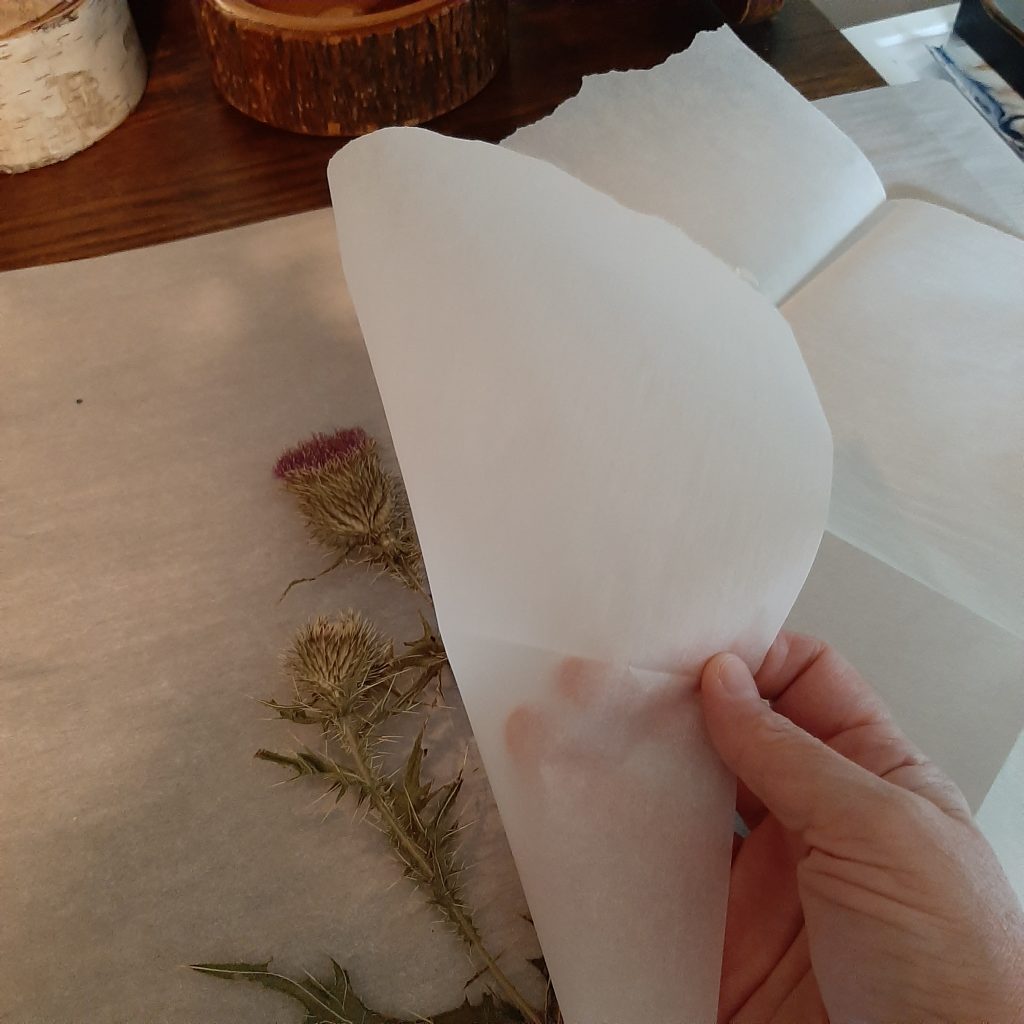
Tear off 2 pieces of parchment paper and sandwich the thistle between those two pieces. ***Note this photo shows the dried thistle, I forgot to take before photos. 😉
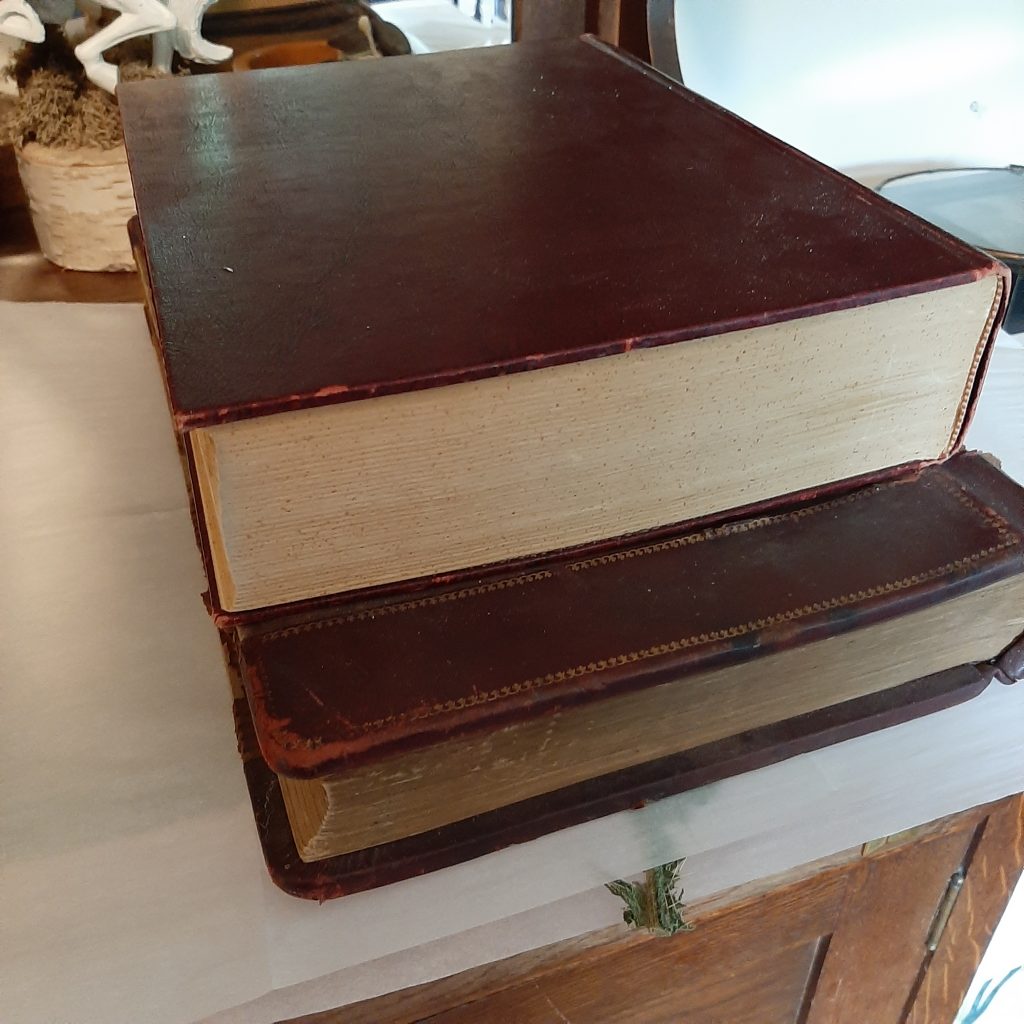
Place heavy books on top of the sandwiched thistle and leave it. I left this for 2 weeks.
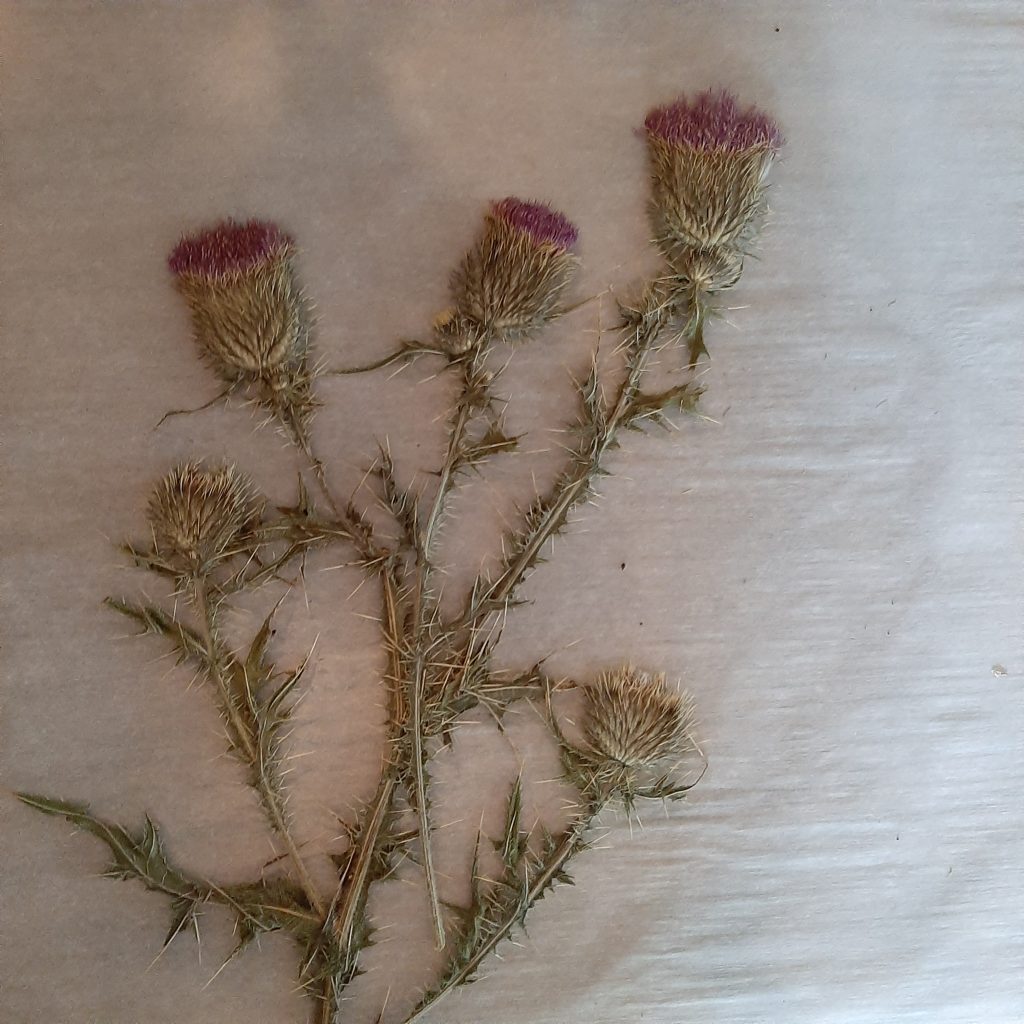
This is the dried plant… I love the way it looks, so I went ahead and used it as botanical art.
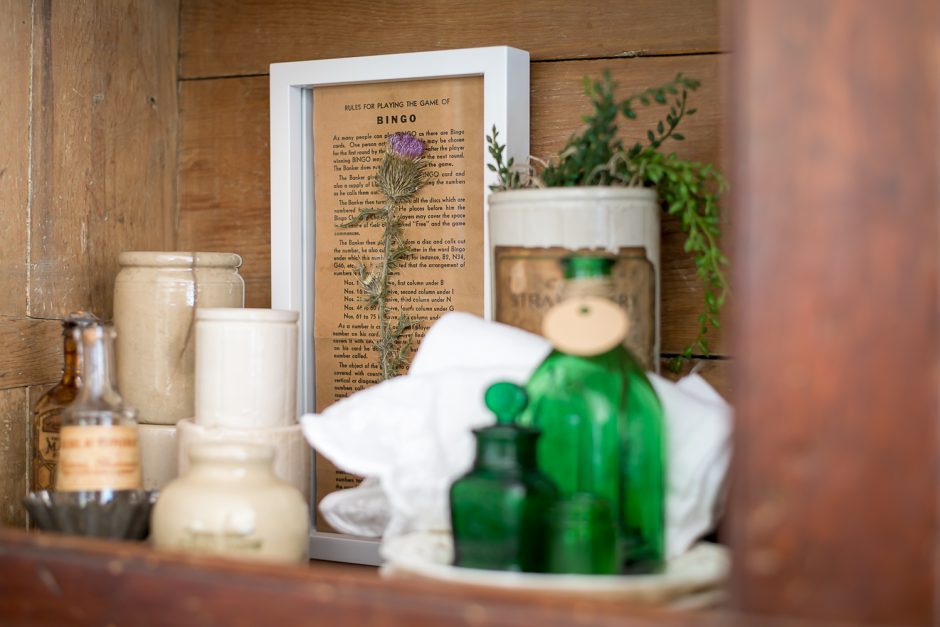
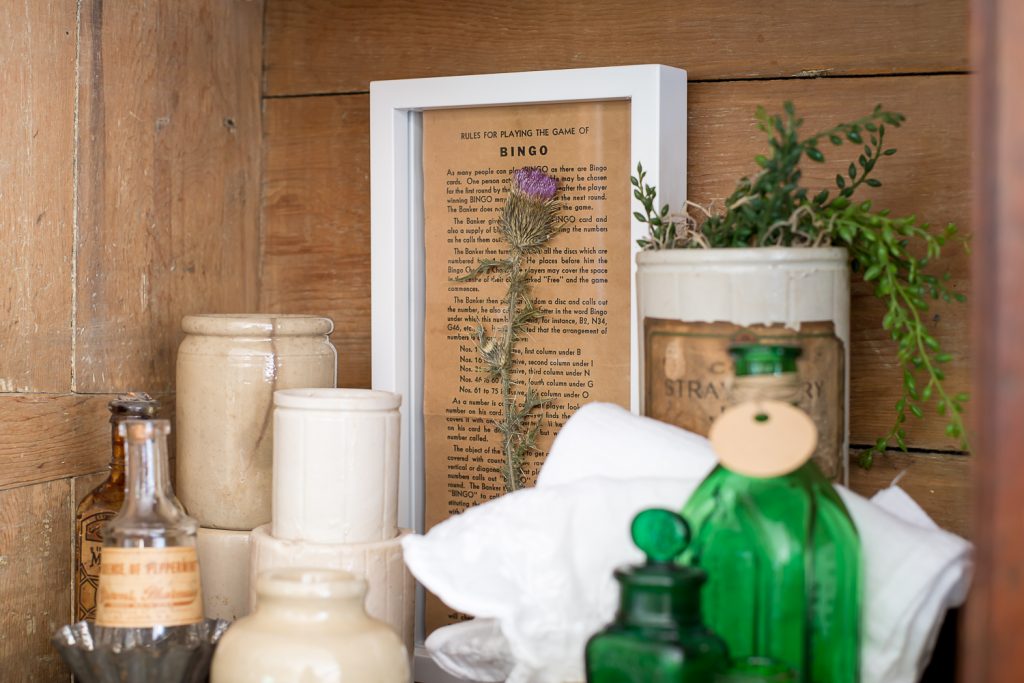
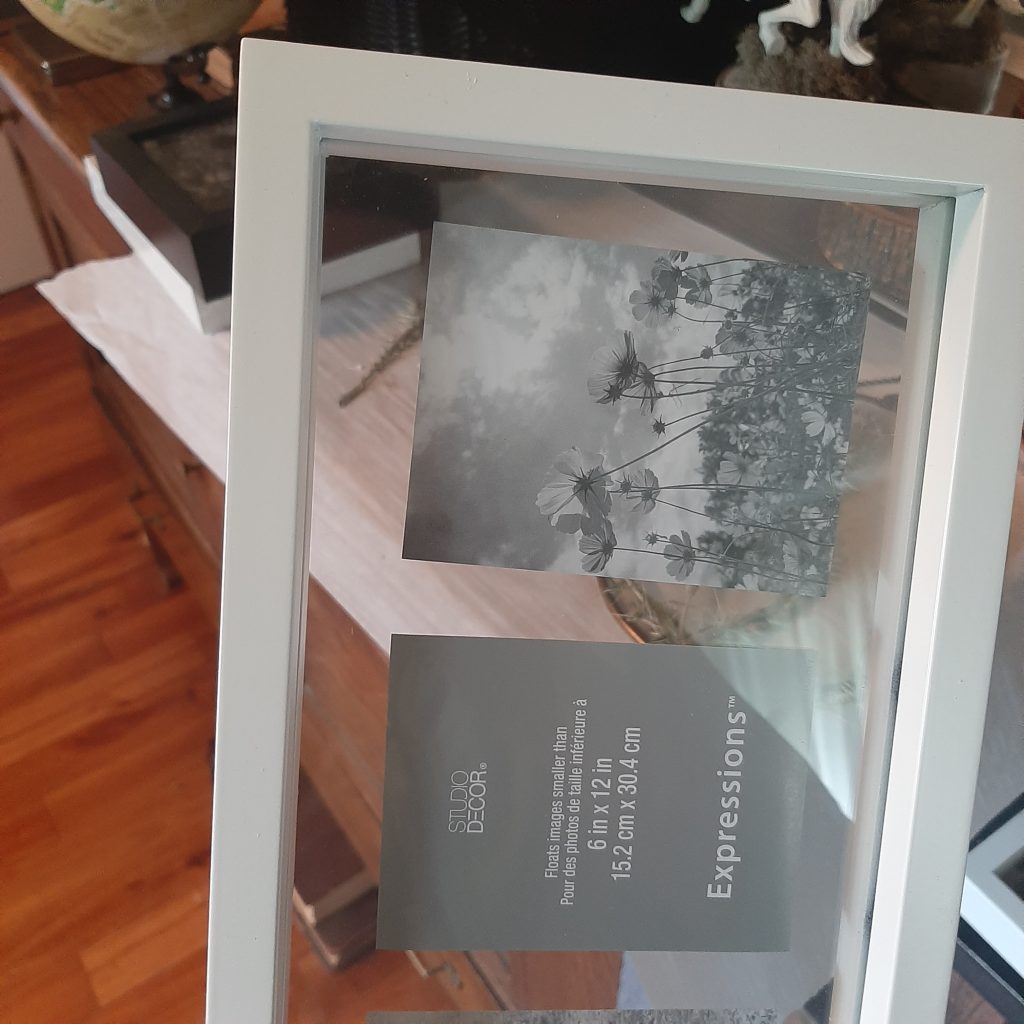
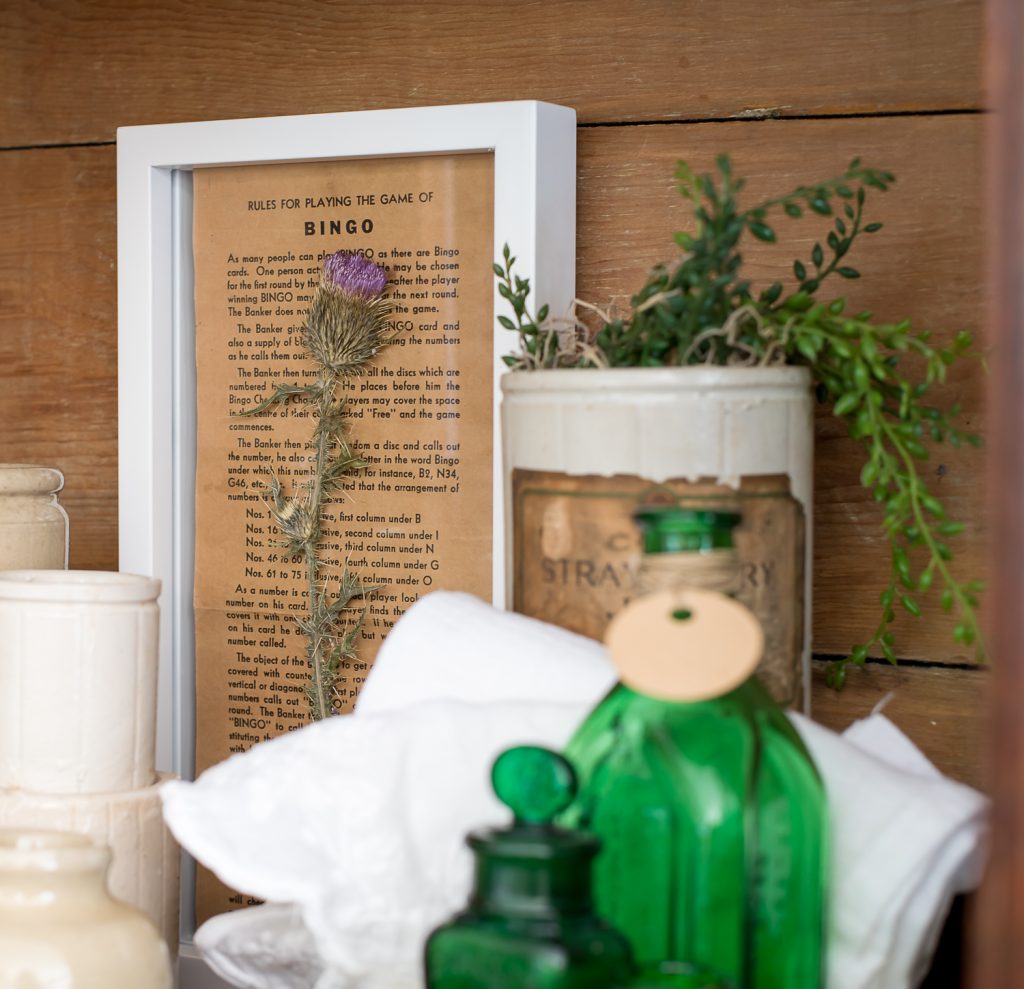
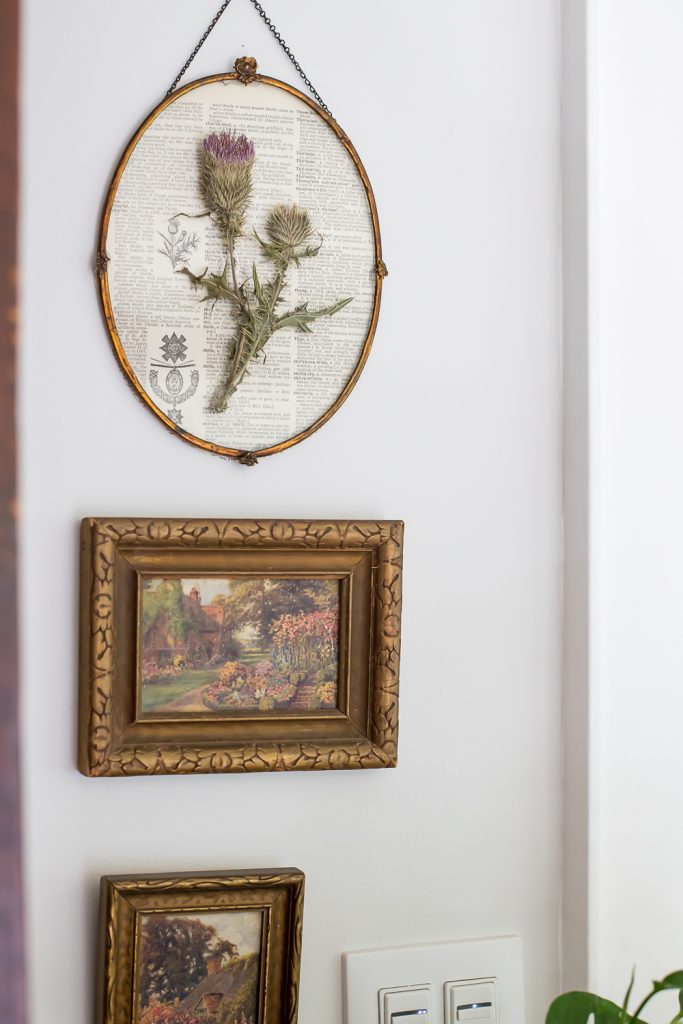
I love these frames from Michael’s, whenever they are on sale I usually grab one or two. The concept for this project was to sandwich the dried thistle between the two sheets of glass, that’s it that’s all. Easy, right? Well sometimes things don’t go as planned… One of the glass sections ended up breaking because the thistle was a little too thick, when I tried to push the glass “sandwich” back into the frame the glass snapped. Darn-it. One piece of glass in a floating frame, what was I going to do with that? I very quickly realized that I should just lay the dried thistle on top of the glass. Glue gun to the rescue! I added little dots of glue on a few sections to the back of the thistle and glued it to the front of the glass. Once that was done I realized it needed a little something extra. I searched my stash and found a vintage bingo instruction sheet, when I tried it on the back of the glass it was perfect. I just added a couple of dots of glue to the frame and paper to hold it in place. I love that the glue from the glue gun doesn’t have to be permanent either, with a little scraper the thistle will come right off of the glass, but I think I’ll be leaving it for a while yet, I adore how it’s turned out! What do you think of my DIY botanical art?
I loved this so much, I decided to make another vintage thistle botanical, I used the exact process with the left over thistle.
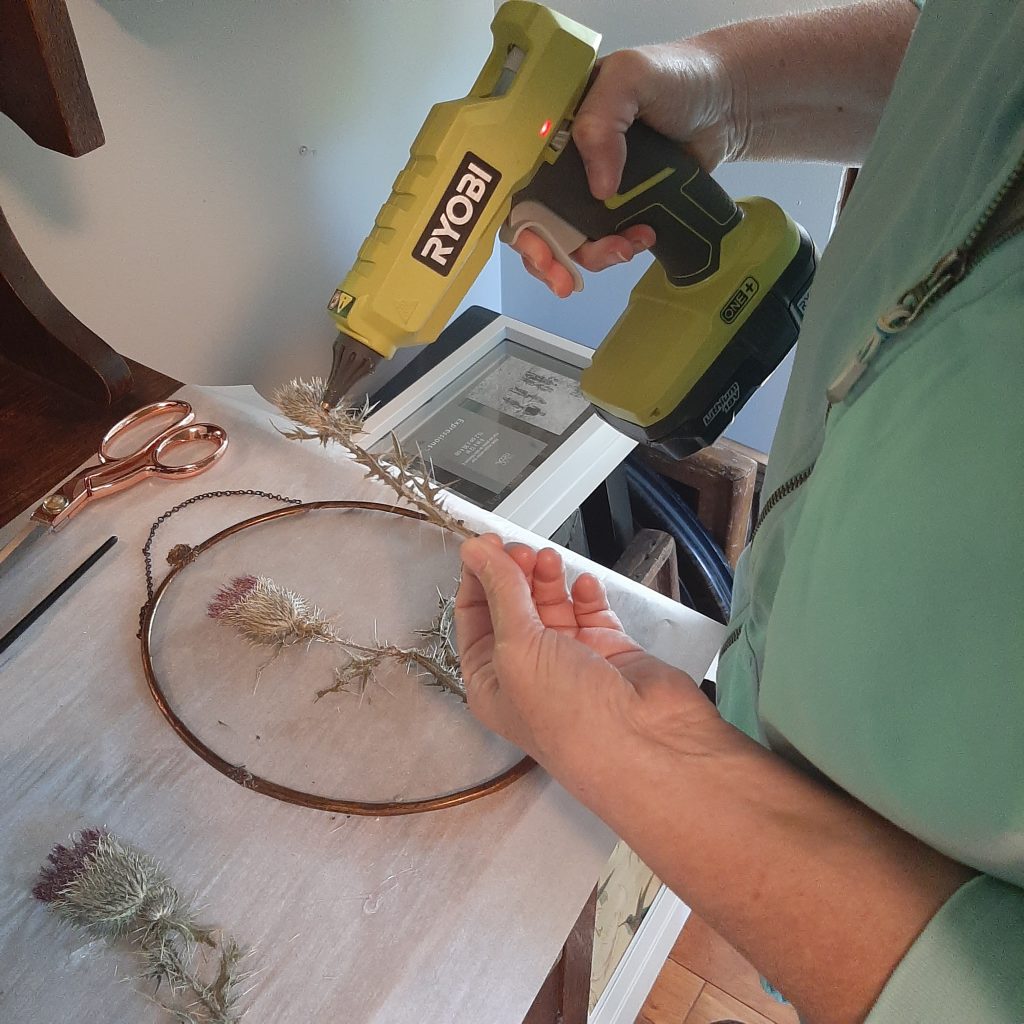
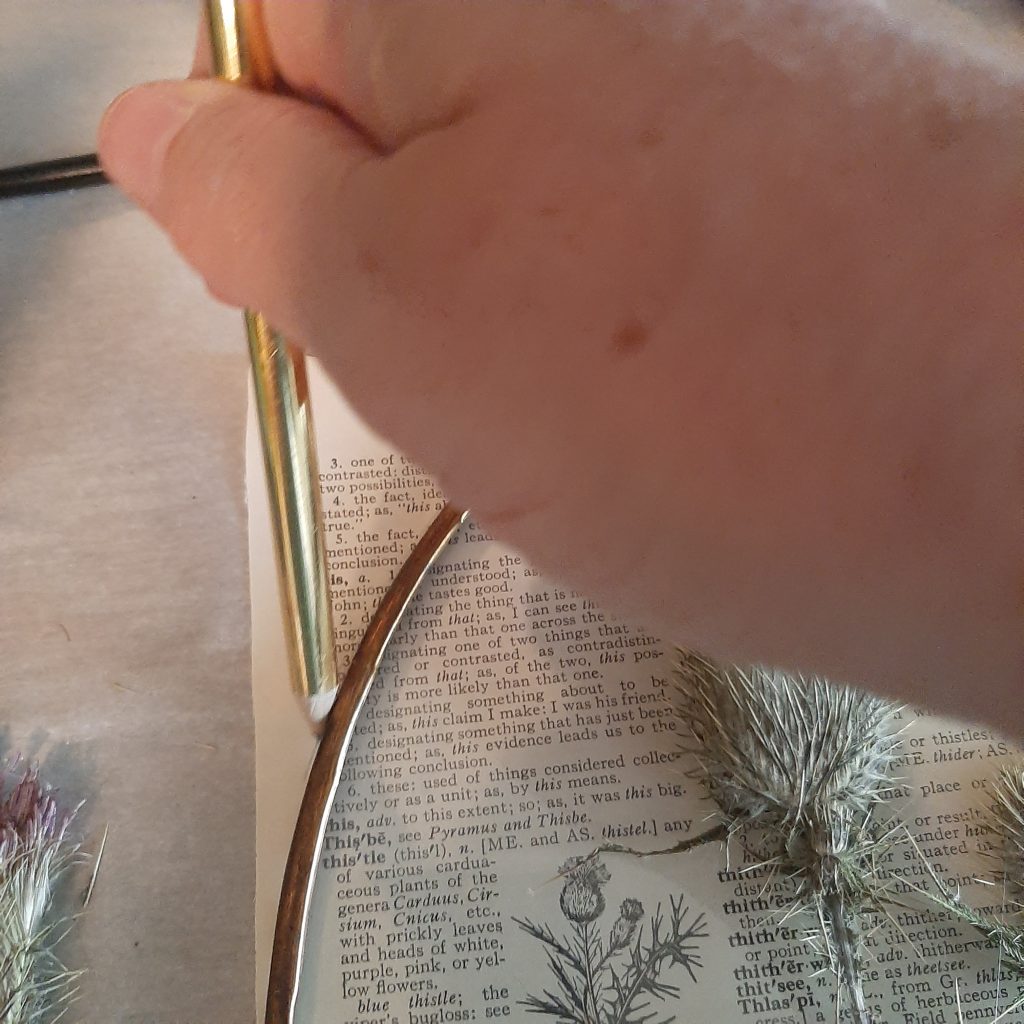
Glue on the back of the thistle and lay it on top of the glass. For this botanical art I decided to use this thrifted copper frame that had no backing at all. I also decided to use a page out of my vintage encyclopedia as backing paper, I’m kind of tickled that I found a page with a description of what a thistle is and a small graphic! Yay!
I simply traced around the frame on to the paper and cut it out with scissors… things don’t have to be perfect, so don’t stress if there is a little over hang. Next step, tack the paper on to the back of the frame with hot glue.
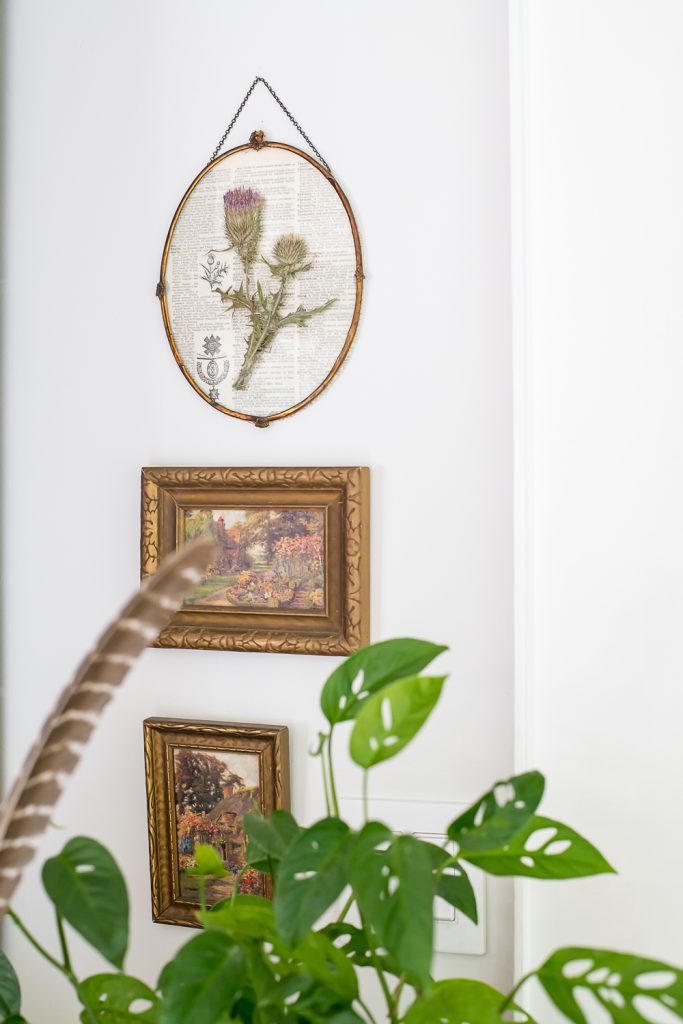
I really love how this little one turned out too!
So cute!
Thank you so much for popping in, I hope you like my DIY botanical art as much as I do? I’m so glad I found a thistle in the “wild”! Now please won’t you go visit my friends I know they will inspire your September too! xo
Cozy Living Team

Town and Country Living / Vinyet Etc. / Duke Manor Farm
Finding Silver Pennies / Creative Cain Cabin / Making It In the Mountains


20 Comments
Oh, wow! I’ve never pressed flowers. These are so very beautiful! xx
Thank you so much Danielle… I’ve pressed a few, but they’ve never turned out quite like I wanted. So glad this one did! 🙂
Oh Laurie – these are beautiful!! I love pressed flowers and think the thistle is so pretty. I’m definitely doing this project – maybe next weekend!
Asss, thanks Jennifer! xo You have to try it, can’t wait to see how yours turns out!
It’s beautiful and I’m surprise how much of the color it retained once dried. Great way to decorate with nature and the things others call weeds:)
Thanks Dawn! I was surprised that the colour stayed too… Yes, there are so many beautiful “weeds” out there!
What beautiful piece of art! You have lovely and creative ideas.
I always enjoy visiting your blog for inspiration.
Awww, thank you Meegan! xoxo
I love your botanical art! I had some botanicals pressed into a phone book years ago which accidentally got thrown out so I never did get around to doing a project. I’m inspired to try this again!
Oh darn, I hate when that happens. You should totally try it again, it’s a wonderful way to add that special touch! I’m so glad you are inspired, thank you! xo
I love this Laurie! I’ve always enjoyed pressed flowers but never tried it with a thistle. So pretty!
Thanks Kristi! I mean they truly are horrible, with all of the spines that poke, but that delicate soft flower is so very pretty! Thank you for stopping in. xo
I love this it looks really pretty and unique. It is something I always say I will try but never get around to it.
Thanks Anita! It is so very easy, you should give it a try. 🙂
Awwwwwwww you used a thistle. My hubby is Scottish and has a special love for this pickley little purple puff ball. I think they’re so unusual and a brilliant choice for something like this. Love how you’ve pressed and framed them Laurie.
That must be why I love them too, my Scottish heritage! 😉 Thank you for your sweet words, Michelle! xoxo
I love beautiful blooming thistles. I never cut them down. I leave in for the birds to eat from and for me to just enjoy. This is a wonderful idea and I’m going to try it.
Thank you Deana, this is my first time cutting one down, I’m so grateful that I was able to so I can enjoy them year round. 🙂
Gorgeous! They’re both beautiful, but there’s something about that oval frame that just grabs me!
Thank you Kim! I adore that oval frame, it’s come a LONG way since I found it at the thrift store. I really have to start taking better before photos. This poor frame had a horrible image mod podged to the back and the glass was painted black all around the image. Lots of brush marks, it was hideous. But that’s a good thing for me, cause I love to see the potential. It’s almost a super power. 😉